Introduction
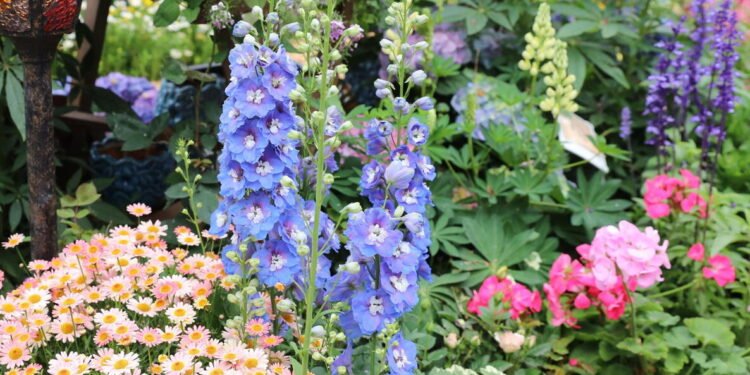
Delphiniums planting can cause you to stop right in your tracks—literally. Have you ever walked into a garden to see tall, colorful flower spikes reaching for the sky? That is the beauty of growing delphinium flowers and doing it well! These stunning perennial flowers add so much color and height to any garden space and can raise an ordinary yard to a whimsical, fairytale-like retreat with floral spires standing 6-8 feet tall.
If you are a beginner in gardening, then the idea of delphiniums planting may seem a little daunting at first. With the right plan and the right timing, many first-time gardeners can still achieve impressive results. This guide will provide instruction on factors from picking your seeds, to transplanting, so you can grow a delphinium garden that is the talk of the neighborhood!
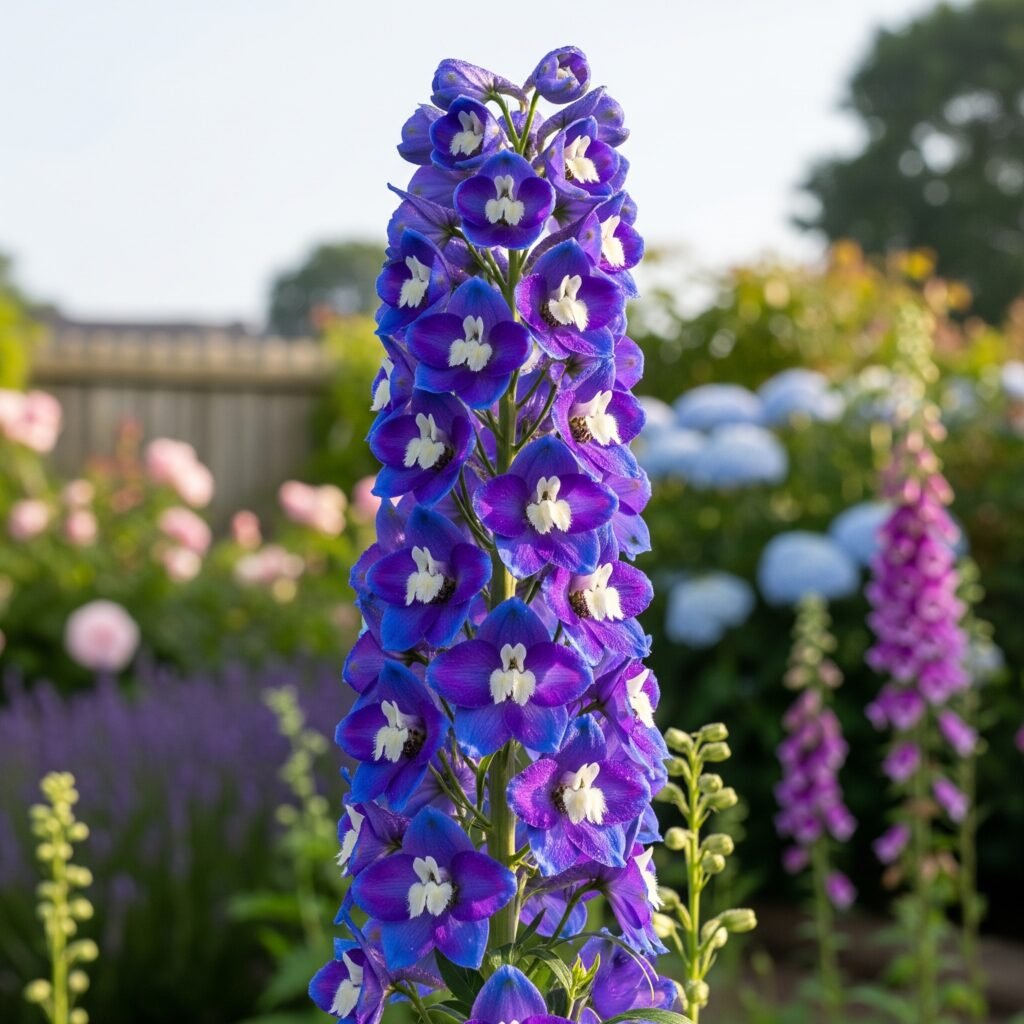
Before diving into your delphiniums planting project, deciding between delphinium types could be the difference between success and frustration. Not all delphiniums are equal, and knowing their traits will help you pick the right delphinium type to meet your garden conditions and experience.
Beginner’s Choice – Belladonna Group
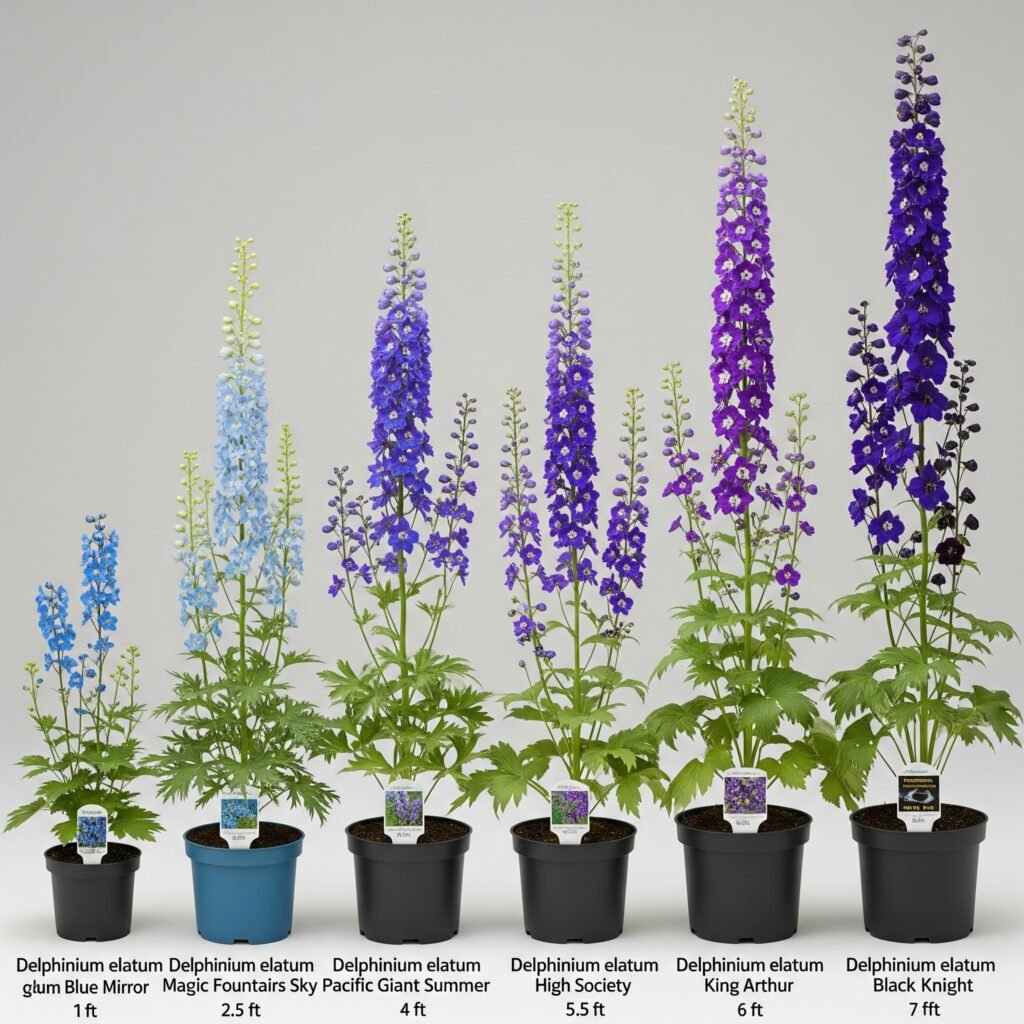
If you are a novice delphinium planter, try the Belladonna group first. Belladonna delphiniums, as natives to North America, are the best way to ease into growing delphiniums. The stand about 3-4ft and have loose, branching flower spikes that move as freely in the wind as the Bumblebee wings that visiting.
The ‘Blue Donna’ variety features clear sky-blue flowers and is the type of delphinium that can withstand the most varied conditions compared to all others. Belladonna delphiniums naturally live longer than others and frequently will produce secondary flower spikes in the fall season, thus extending your seasonal color.
Impressive Elatum Varieties
If you are an experienced gardener and want to create maximum impact, then Elatum delphiniums are the hardest to beat when it comes to drama. These giants get 6-8 feet tall and have flower spikes that are very dense and in captivating shades of purple, blue, pink, and white.
Elatum varieties such as ‘Aurora Deep Purple’ will create a spectacular plant in your yard but will take much more time and work to grow successfully and most likely not be as hardy. These varieties tend to be short-lived and are typically treated as biennials and not truly as perennial plants.
Multi-purpose Pacific Hybrids
If you want the best performance from an overall planting perspective, the Pacific Hybrid delphiniums are the sweet spot! Pacific Hybrids range from 4-6 feet tall, and their flowers are 3″ or so in diameter available in violet, blue and pink shades.
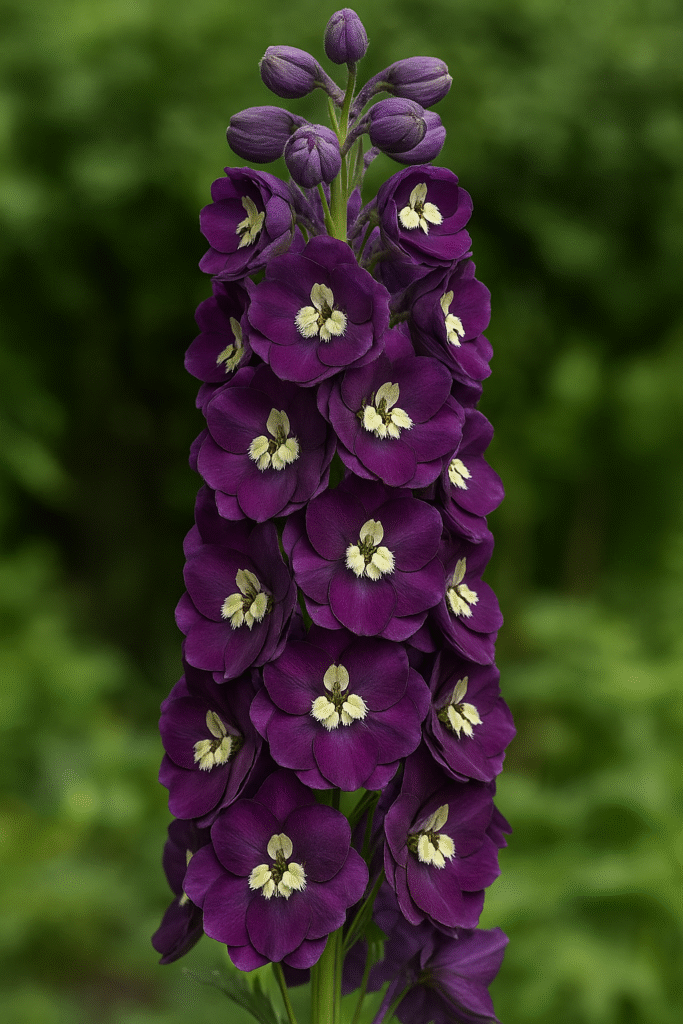
The popular “King Arthur” variety grows to 5-6′ high with vibrant plum colored flowers and white centres. Its height is impressive, but the flower size is even better. The Pacific Hybrids do better in hot climates than the Elatum types but it is quite marvellous for height and flower size.
Tip Box: I recommend planting Belladonna types for your first and perhaps last experience of planting delphiniums. They are so easy to grow and will give you confidence for planting other types of delphiniums.
Ideal Timing for Delphiniums Planting
Timing for planting delphiniums is essential for success. Delphiniums are cool-weather plants and have specific seasonal requirements that will vary based on your planting method and local climate conditions.
Success with Spring Planting
Almost all delphiniums planting will occur in spring. Two-thirds of the way into spring you can begin planting your nursery-grown transplants once you have had the last frost and soil temperatures have consistently risen to 50-60° F for two weeks. This time is the best for your plants to establish a solid root system for the warmth of summer.
With most of the continental U.S. you can plant your nursery-grown transplants between March and May. However, springtime is the perfect time for you and your plants. You can develop a healthy root structure for your delphiniums, without the stress of hot summer temperatures.
Opportunities for Fall Planting
In areas with mild winters (zones 7-9), delphiniums thrive when planted in the fall. Plant your delphiniums 6-8 weeks prior to your first hard frost to allow adequate root establishment before going dormant for the winter.
Fall delphiniums often bloom earlier and more profusely the next spring, as they had a chance to establish a root system for months during cooler weather.
Schedule for Seed Starting
When starting from seed, delphiniums can be challenging to time because they need cold stratification. To ensure timely sowing, start your delphiniums from seed 10–12 weeks prior to your last frost date.
For two to four weeks prior to germination, seeds require a cold environment (35 to 40°F). This can be accomplished naturally in the spring through refrigerator stratification or by putting them outside for direct sowing in areas with consistently cold winter temperatures in the fall.
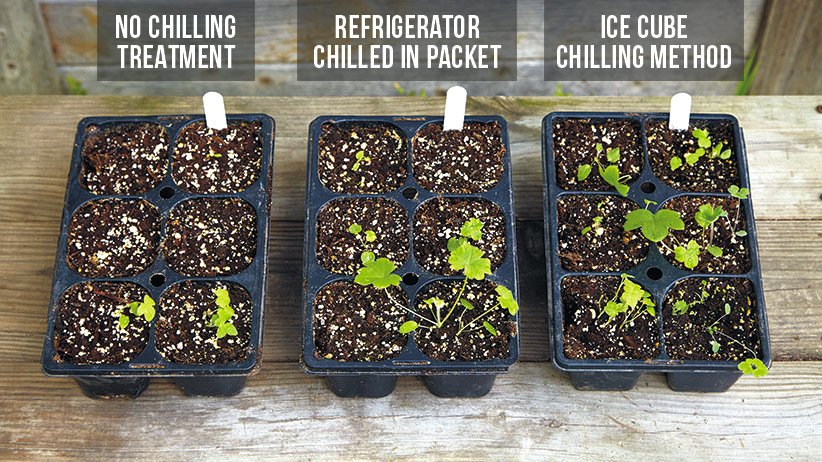
Warning Box: Never try planting delphiniums in the sweltering summer months! When temperatures rise above 75°F, plants become stressed and struggle to establish.
Site selection and Soil preparation
The starting point for successful delphinium planting is the proper site selection, and the proper soil preparation to ensure the perfect conditions are at hand. These large spectacular plants have specific needs, but when planted correctly, they will provide years of incredible blooms.
Choosing the Proper Planting Site
The first couple of criteria for delphinium planting is a site with 6-8 hours of morning sun, with some afternoon protection from intense sunlight. Delphiniums like a lot of sun, but if the heat of the afternoon gets too intense, the plants may be stressed and the flowering will be reduced.
Also, protecting them from wind is critical. Tall delphiniums have hollow stems and wind will simply snap them off. Choose sites that are sheltered by a fence, wall, or some other type of structure, while allowing for sufficient air circulation to reduce disease problems.
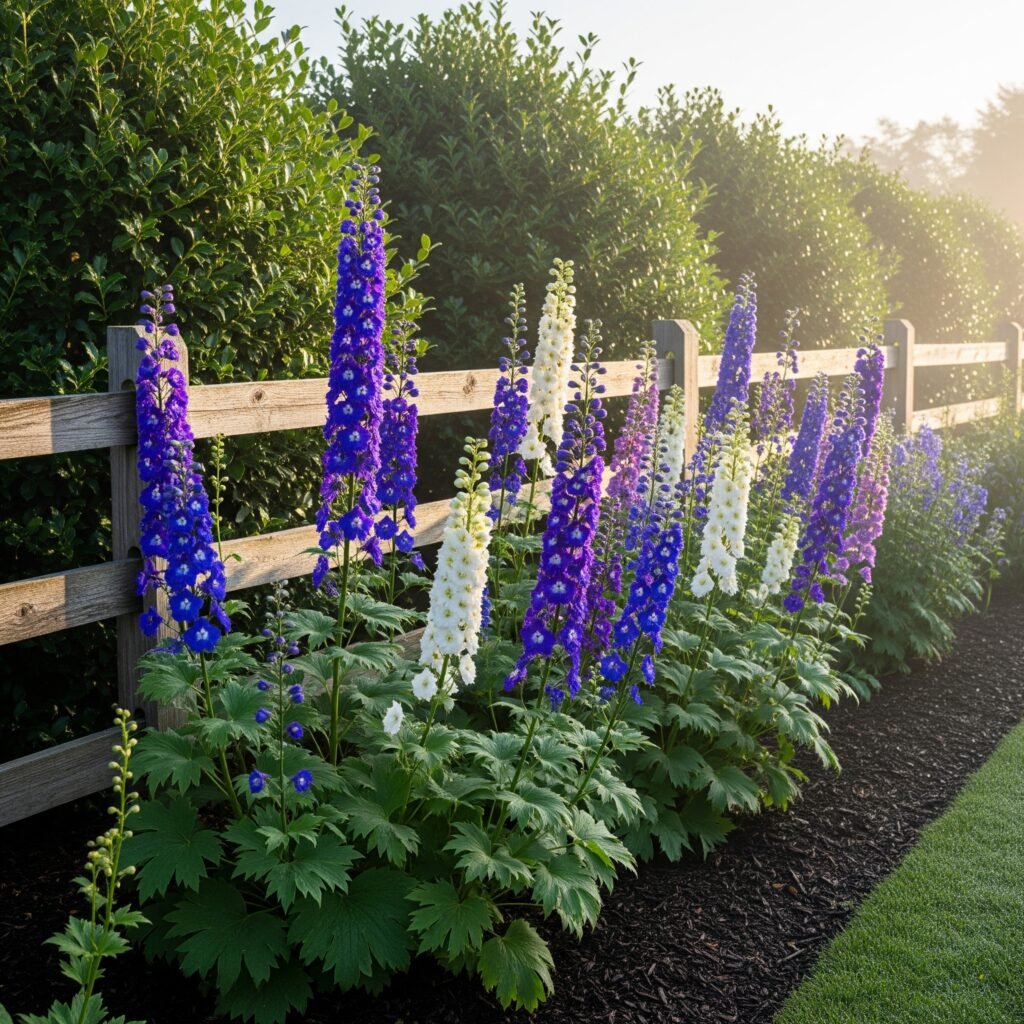
Soil Preparation Essential
To enable delphinium growth, a well-draining, fertile soil with a pH of 6.2-7.2 is required. These are heavy feed plants with a high demand for soil rich in organic matter to support their rapid growth and their enormous flower production.
Before planting, I would test your soil pH. Acidic soils will require you to add lime to raise to desired pH, and alkaline soils will likely require you to add sulphur, or organic material to lower the pH over time.
Making the Ideal Soil Mix
Improve the soil you plan to plant in by making this ideal soil mix:
- 50% native garden soil
- 25% well-aged compost
- 15% perlite or coarse sand provided for drainage
- 10% aged manure provided for slow-release nutrition
This mixture yields outstanding drainage but also retains moisture and nutrients necessary for supporting health delphinium growth.
Drainage Issues with Heavy Soils
Poor drainage puts your chances of successfully planting delphiniums in jeopardy. If your heavy clay soil has poor drainage, you’ll want to construct raised beds over the existing soil or if you are digging planting holes, create a layer of gravel in bottom of the hole before filling it back in with your amended soil with the above mixture come planting season.
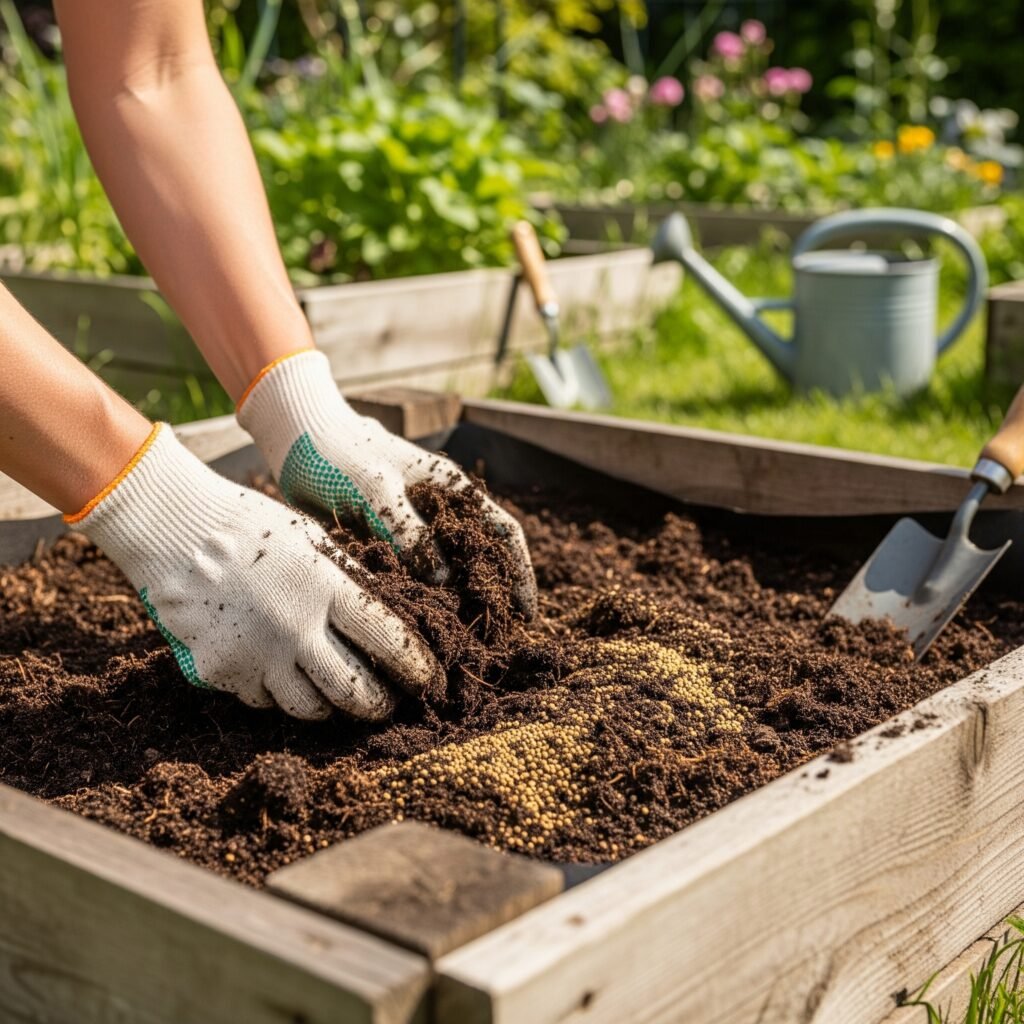
Quote Box: “Soil preparation is a lot like foundation work for a house – it may not look appealing, but it determines whether your delphiniums will flourish for years or struggle from the first day.” – Master Gardener Robert Chen
Seed Starting and Transplanting Techniques
If you are growing Delphiniums from seeds or transplant, the planting technique affects the long-term success and each method has its advantages and skills needed to grow Delphinium successfully.
Starting Delphinium Seeds Indoors
Starting seeds indoors gives you the widest selection of varieties and is generally much cheaper than getting transplants. When starting Delphinium seeds indoors, you will want to start the planting process 10-12 weeks before your last frost.
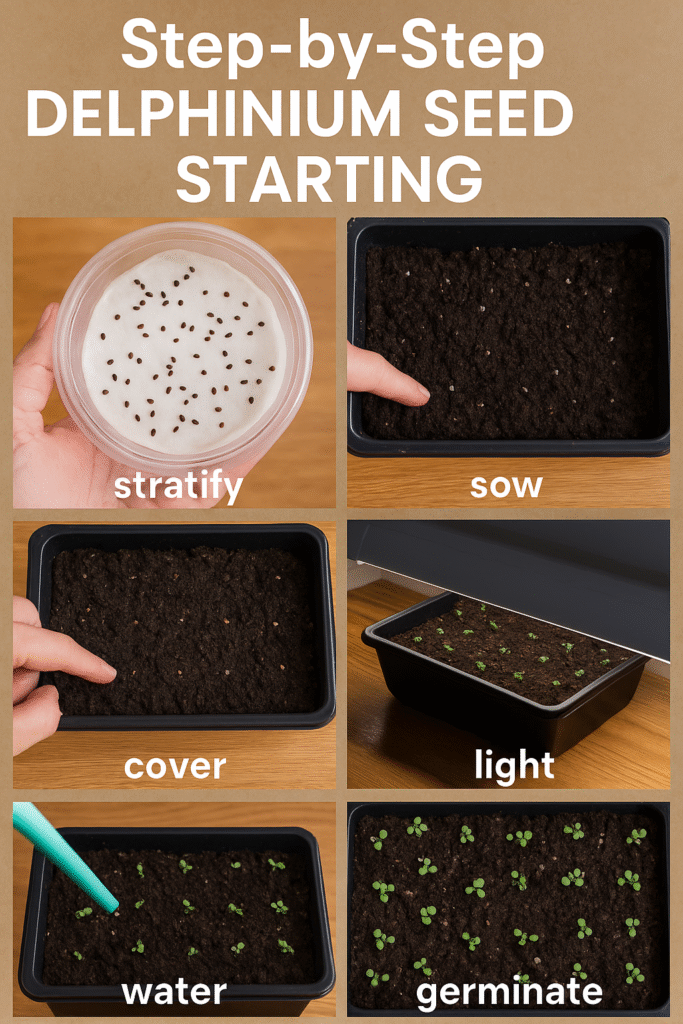
The first step in the process is to cold-stratify your seeds. Mix your seeds with some slightly moist peat moss in a sandwich size zip-top plastic bag and seal them tightly. Place them in the refrigerator for 2-4 weeks at 35-40 degrees F (your refrigerator is 30-34 degrees so take them out of the air temperature for the right stratification temperature) and break the dormancy of the seeds which will also vastly improve their germination rates.
After you have cold-stratified the seeds, sow them in quality seed-starting mix at a depth of ¼ inch and keep the soil temperature at 60-65 degrees F (you may need to use heating mats to achieve this). Seeds will typically germinate between 14-21 days under perfect conditions.
Methods for Direct Sowing
When using direct sowing methods, delphiniums seeds will germinate best if planted in the fall or in the very early spring when soil temperatures are consistently cool. To prepare seedbeds, incorporate 2-3 inches of compost into the top 6 inches of soil.
Sow delphinium seeds ¼ inch deep and space them from 4-6 inches apart to start. Keep the soil moist, but avoid watering the seeds to the point of a saturated soil medium. After the seedling’s second set of true leaves, thin the seedlings to a spacing of 18-24 inches.
Moving Seedlings Outdoors
Delphiniums seedlings can be planted outdoors, when they reach 3-4 sets of true leaves and are 4-6 inches tall. Gradually harden off the plants to outdoor conditions over a period of 7-10 days increasing the outdoor exposure time each day.
Dig the planting holes 2 times the width of the root balls, and the exact same depth. When transplanting, plant the seedlings at the same depth they were growing in the containers, backfill with the amended soil, and water thoroughly immediately after planting.
Working with Nursery-Grown Plants
Everything associated with nursery-grown transplants is the fastest method to arrive at blooms, as many plants will flower the same season in which they are planted. Select plants with lush green foliage and their root systems well-developed and visible at the drainage holes.
You should either plant immediately or place in a protected area maintaining consistent moisture until planting time arrives (up to a week after purchase). Never allow the root balls to dry out completely as this severely stresses plants causing a reduction in times of successful establishment.
Tip Box: While transplanting, always plan to conduct delphiniums planting on cloudy days or during the evening so as not to create early stress from bright daylight on the young transplants.
Resolving Common Delphinium Planting Problems
Even with the very best of transplanting technique for delphiniums, problems can still arise. Generally, these are minor setbacks, but it is best to recognize and deal with them as possible so that it does not make a small failure a major one.
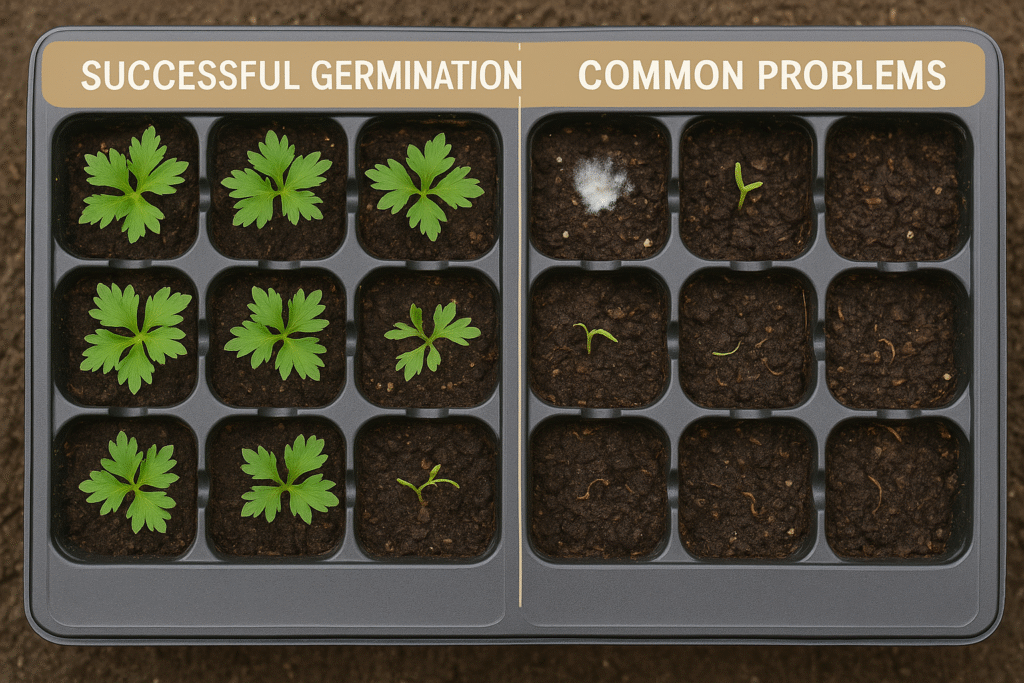
Germination Problems
Most poor germination is due to skipping the cold stratification portion of the process or because of planting the seeds in warm soil. Delphinium seeds require cold treatment to break dormancy successfully.
If the seeds have not germinated in 3-4 weeks, check the soil temperatures and moisture level. Soil temperatures should remain cool (60-65 ºF) and should be consistently moist but never too wet.
Solutions for Transplant Shock
Delphiniums will wilt or yellow after you plant them indicating transplant shock. This happens most often when the plant is disturbed during hot weather or if the root system was damaged as a result of the transplanting.
After planting, it is helpful to provide temporary shade for 7-10 days. This will give the delphiniums time to re-establish themselves before applying direct sunlight. In addition, you want to maintain an even moisture level in the soil—never overwater! If you follow these guidelines, you will find that your delphiniums recover from transplant shock in approximately 2-3 weeks after planting.
Pest Problems During Establishment
Slugs and snails are the most likely pest threats to your new delphiniums planting. They can literally defoliate a young plant overnight, wiping out months of growing for you.
Use copper barriers around your plants and/or organic slug pellets for additional protection on your seedlings, as they are vulnerable while being established. Additionally, position traps filled with beer nearby—we find this to greatly reduce slug populations while not harming beneficial insects.
Site-Related Issue
If you are following the previous guidelines but your plants continue to struggle, you need to take a good look at your site. Below, we list out the most common issues.
- Not enough sunlight exposure (less than six hours a day)
- Poor soil drainage and causing the delphiniums to have root rot.
- Competition from nearby trees or shrubs.
- High exposure to wind.
Come to grips with these primary issues before trying to establish more delphiniums at that location with your site conditions.
Warning Box: Do not plant delphiniums in an area where water stands after any rainfall. Poor drainage will kill more delphiniums than any single factor.
First-Year Care After Planting
The first growing season after planting delphiniums sets the stage for long-term success. How well you care for them during this crucial time will determine whether your plants thrive for years to come, or whether you’ll fend for them every year with little success.
Watering Newly Planted Delphiniums
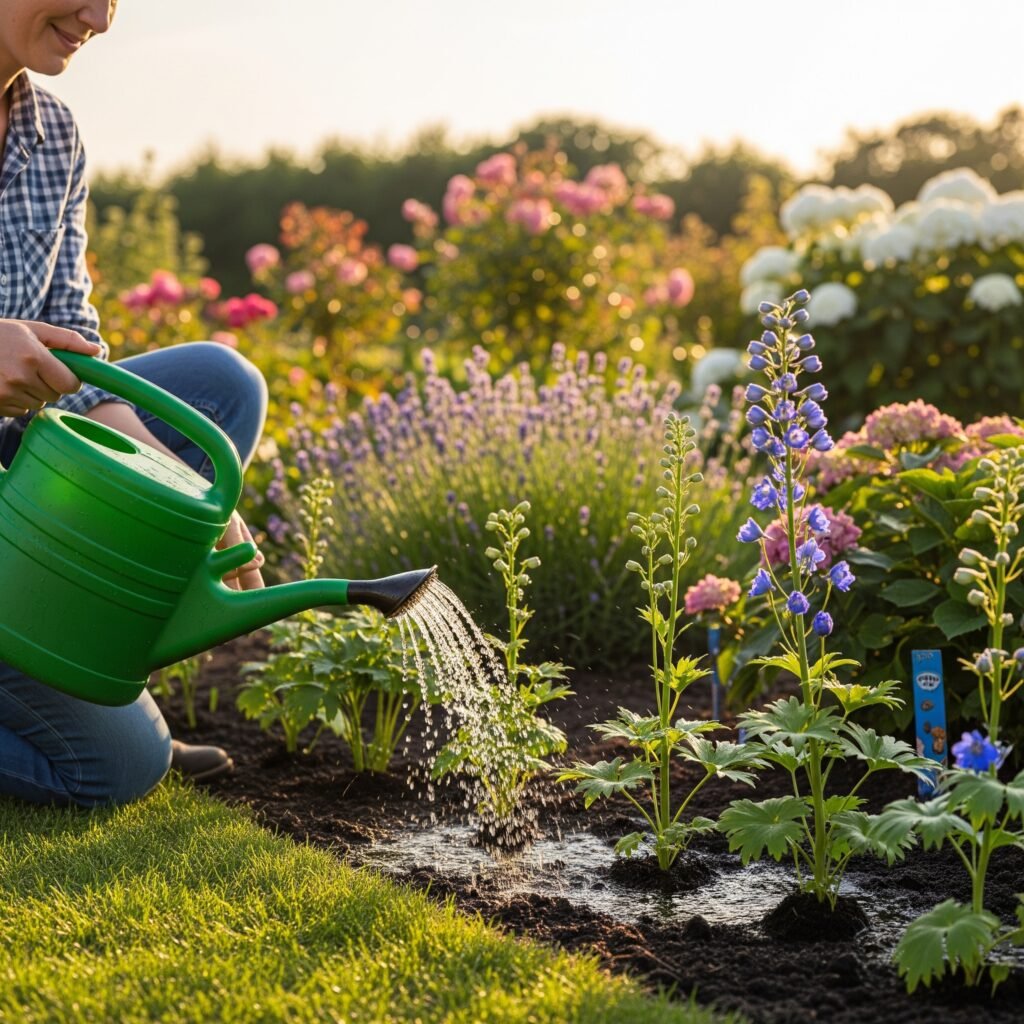
Watering newly established delphiniums should always ensure that they are kept moist, but never over-watered, as delphiniums do not like to have wet feet. Water deeply 2-3 times per week, rather than daily with little water. This will encourage roots to grow down and become established.
Always apply water at the base of the plants, using soaker hoses or drip lines if possible, to avoid wetting the foliage. Wet foliage can contribute to fungal disease problems that can kill the young delphinium plants before they are established.
Fertilizing During the First Season
Feeding should begin as soon as the plant shows new growth, which typically occurs within about 2-3 weeks of planting delphiniums. Use a balanced fertilizer (10-10-10) applying course according to the package directions every 4-6 weeks, or once during active growth.
Once the plants are established, supplement with a liquid fertilizer every two weeks during the estimated peak growing period (late spring to mid-summer). Stop feeding 6-8 weeks before your expected frost date to allow time for dormancy in preparation for winter weather.
Support & Staking
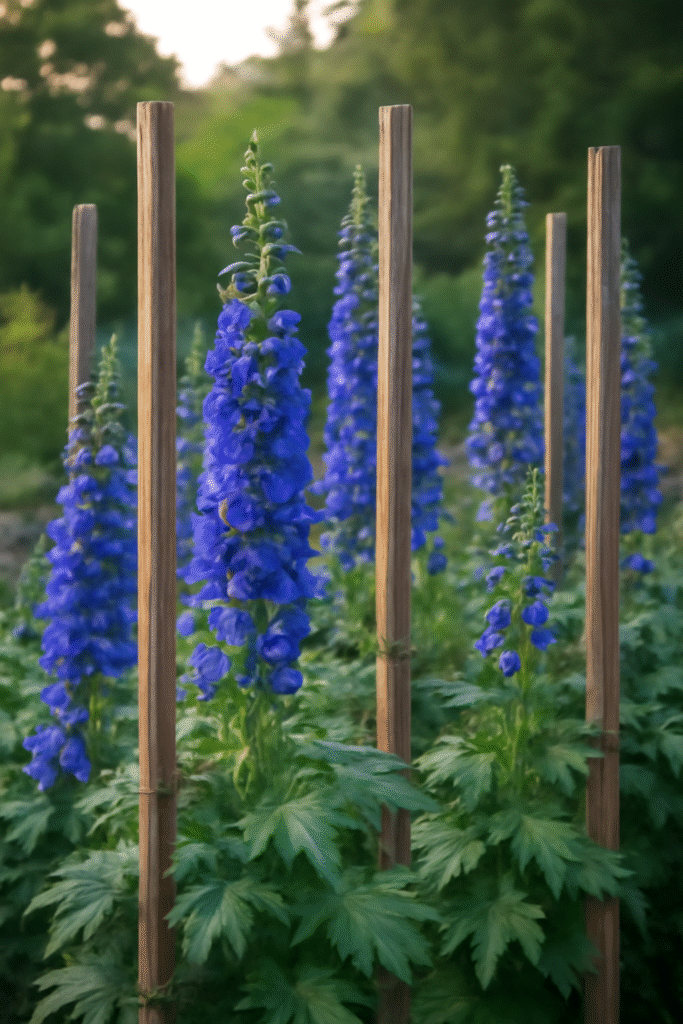
It’s best to install stakes as soon as you have plants that are about 12 inches tall. They may not need support at this point but it will give them a chance to grow around their stakes naturally, and, to have the best possible look.
Most plants are staked with traditional 6-foot stakes. Place stakes 12 inches deep and 2 inches from the main stem. After the stake is in place, tie the plants loosely with soft materials such as cloth strips or specially made plant ties.
Quote Box: “The first year following the planting of delphiniums is like having a teenager; constant supervision and attention is needed, but it’s worth every bit of effort when they start to grow up.” -Maria Rodriguez, Garden Designer
FAQ
When should I plant delphiniums?
The best time of year for delphiniums planting is in spring, roughly 2-4 weeks after your last frost date when the soil temperature is in the range of 50-60°F. This should fall between March and May in most climates. Fall planting is appropriate in zones 7-9 when done about 6-8 weeks before the first hard frost. Avoid planting in the hot summer months since they tend to struggle in temperatures above 75°F.
Can I do delphiniums planting in containers?
Yes, you can do delphiniums planting in containers but make sure you have large pots that are at least 18-24 inches deep and wide. Use a well-draining potting mix and make sure the containers have adequate drainage holes. Container plants need more watering and feeding than ground planted specimens. If planting in containers, try to stick to the shorter types like the Belladonna types, if possible.
How far apart should delphinium plants be planted?
Properly space delphinium plants 18-24 inches apart when planning on delphiniums planting, this will improve air flow, and help to prevent diseases from forming. Proper spacing allows each plant to develop their full size with little competition for nutrients and water. With closer spacing, you should expect to engage in closer management and the odds of dealing with pest and diseases increases.
Why did my delphiniums fail after planting?
Reasons for failure when planting delphiniums include poor drainage (aka #1 killer), too deep of planting, not enough sunlight, and stress from hot weather. Other points could include, not enough cold stratification for seed, the plant was poorly handled and develop transplant shock, or slugs attacked young plants. The most important thing is to fix any drainage related issues first, as over watering is responsible for failure of more delphiniums than any other single factor.
